I have been working with visual studio and .net application for a few years now. And one of the things we use a lot are deploy commands. In the beginning I would go to the Windows Explorer and run from there. But I found out that it was much easier to create a menu item in Visual Studio called “Run with CMD”. Now a days I upgrade visual studio as soon as I can get a new laptop from work and I have to create the item again. I always struggle on getting it set up, also when colleagues of mine ask me how to do this. Therefore I have decided to write an article about it describing how it is done using simple steps and images.
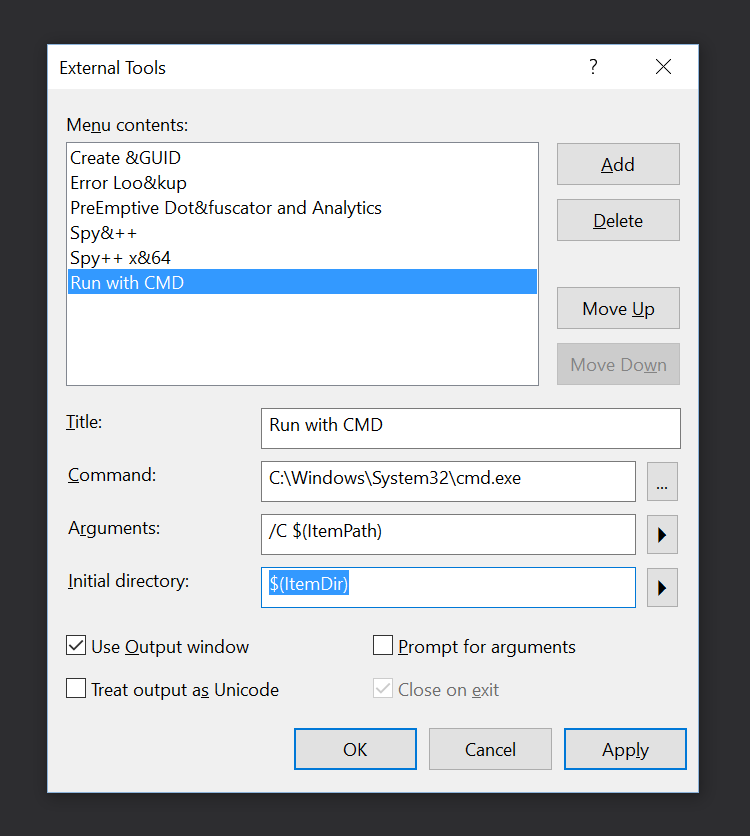
The first step is to go to “Tools > External Tools.. > Click Add”. Then type in the following fields:
Title: Run with CMD
Command: C:\Windows\System32\cmd.exe
Arguments: /C $(ItemPath)
Initial Directory: $(ItemDir)

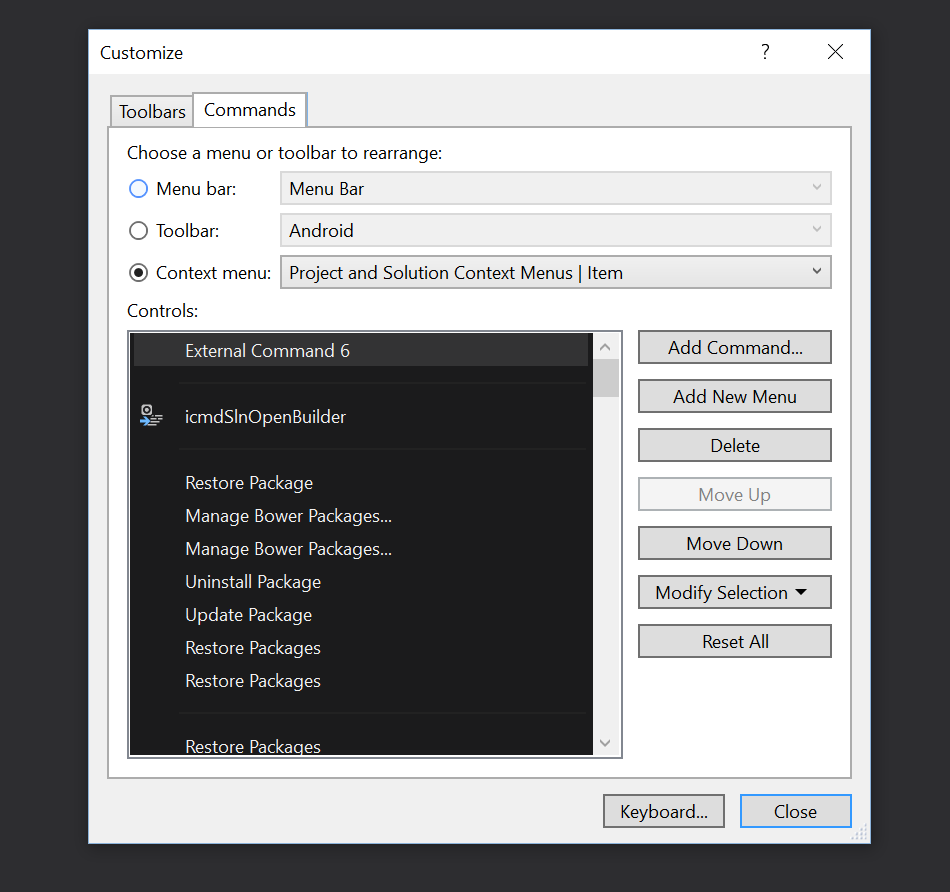
Click ok and then go to “Tools > Customize > Commands tab”. Next select the “Context menu” and select “Project and Solution Context Menus | Item”.

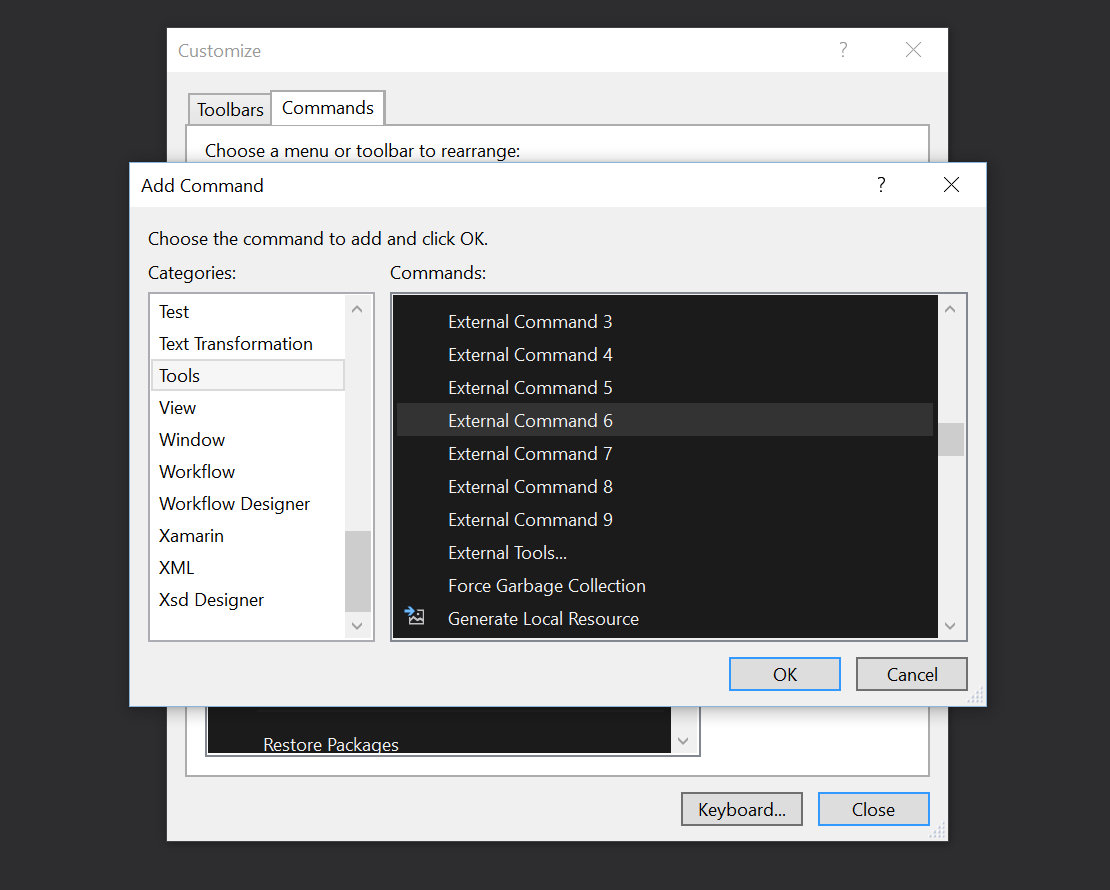
Then select Add Command. Next select the category “Tools” and select the External Command that you need. In the example above you see that “Run with CMD” is the sixth item in the list so select External Command 6 depending on the number of commands already used. Finding out which number to use look at the current number of items when you go to “Tools > External Tools..

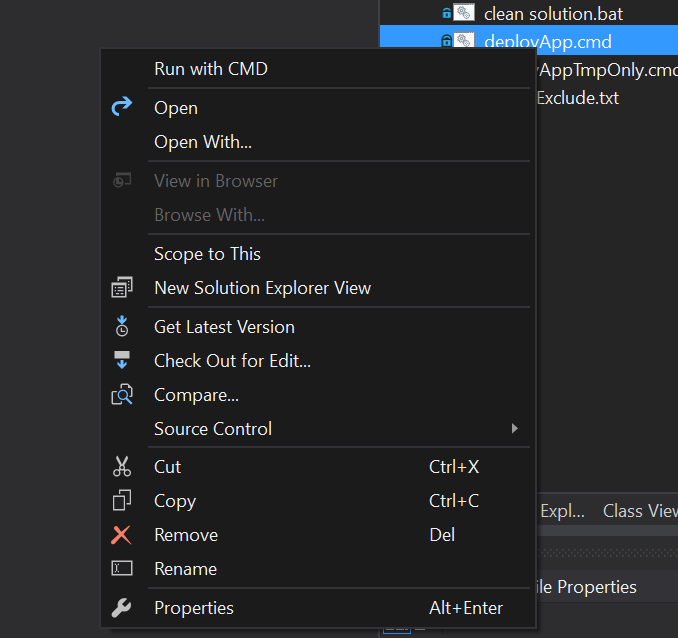
Now when i right click an item in the Solution Explorer it will show the created command. And I can use it for example in my command line for installing web applications.

I hope it will help everyone as much as it helps myself. I know I will come back to my own page when I set up a new laptop or pc with Visual Studio.